Malfunctioning headphones can be maddening. Right in the middle of an invigorating workout, the music just stops. Or it’s heard in only one ear. Or there is a sudden tinny sound. Headphones are expensive, and it can be extremely frustrating when they don’t last, especially if it happens to you while traveling. In such moments, many wish they knew how to repair headphones.
It is much more difficult and time-consuming to just wing this sort of thing, as a lot of time can be saved by having a plan of action and a step-by-step troubleshooting list.
This helps to avoid missing an easy fix before digging into much more complicated situations first, realizing later that this was not the issue, and having to go all the way back and fix a much easier problem that could’ve been spotted earlier in the diagnosis. Here is a little introduction to the world of DIY headphone repair.
Can Non-Engineers Learn How to Repair Headphones?
Headphones, especially Bluetooth-enabled headphone devices, often make use of the latest technologies, but one need not be a nuclear physicist to fix a basic wired pair. All one needs is some knowledge and a plan of action before beginning. The first step in formulating that plan is to diagnose and pinpoint the problem.
Diagnosing the Problem
Headphones have multiple parts, and there can be several causes of the malfunction. Here is a simple step-by-step rundown on how to troubleshoot broken headphones.
Step 1: Are the Headphones In Fact Broken?
To see whether headphones are actually broken, it’s best to start with some basic troubleshooting. Make sure:
- The headset is plugged into the jack plug on the device properly, unless they are wireless headphones
- The volume control (if one is included on the earphones) is turned up
- Any mute button on the headphones is off
Next, consider whether the device you are plugging the headphones into is properly situated. Make sure:
- The volume on the device is turned up
- Any mute button on the device is off
- The device has power
Finally, before assuming headphones are broken, borrow another pair and plug them into the device in question. If there is no sound or bad sound with either set of headphones attached, then you won’t need to know how to repair headphones. You may, however, need to purchase a new phone, iPod, or any other type of music playing device.
Step 2: Which Part Needs Fixing?
Once the headphones are identified as the problem, it’s time to get specific. The following specific parts may be malfunctioning:
- The plug
- The wire
- The earpieces
Is the Plug Broken?
The plug is the part at the end of the headphones. This is the part that inserts into the headphone jack of a music-playing device. Because it is often pulled and pushed in and out, it is subjected to considerable wear and tear. This makes it a fairly common cause of headphone malfunction.
1 test to determine whether the plug is the problem is to move the plug carefully in and out of the jack on your phone, computer, or whatever device you are trying to play music from. If the headphones work but only while you are moving the plug or applying pressure on it, then that’s a strong sign the problem is with the plug.
Is the Wire Broken?
Headphones are often tossed around, and this can cause the wires to tangle. It is, therefore, not surprising that headphone wires (aka cables) often end up malfunctioning.
Here’s a test for wire issues. First, make sure to check for exposed wires, which are bare wires with no rubber coating on them. If exposed wires are present, this could be a good indicator that they are the source of the issue you are having.
After you have looked over the cable up and down for exposed wire, with the device on, bend the cable back and forth.
Do this starting at the base of the cable, near the plug, and continue to do this while moving your thumb and fingers slowly up toward the earpiece. If the sound is audible to any extent, but cracking or changing when the wire is manipulated, then this is a very good sign the problem is most likely with the cable.
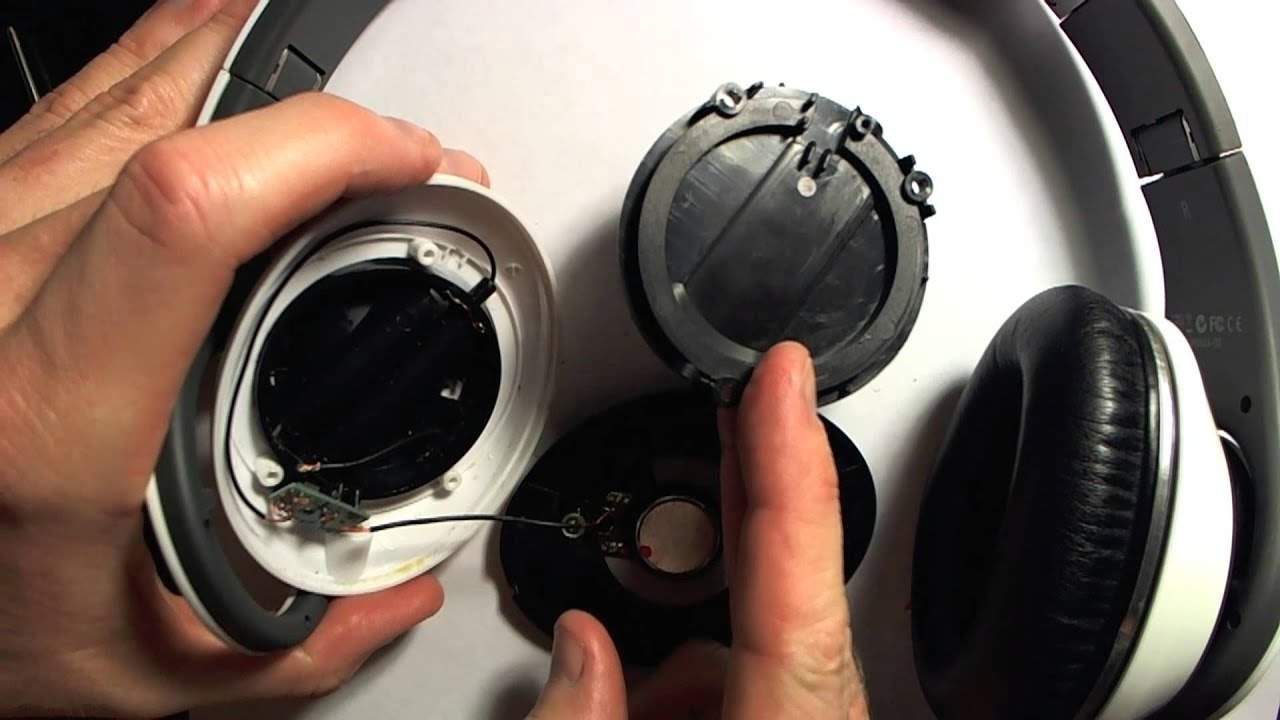
Is the Earpiece Broken?
Inspect the earpiece or individual earpieces. Are there signs of moisture or other physical damage?
If, as is the case with some devices, the earpiece is removable, try to replace it temporarily with another earpiece. If the other one works, then it’s clear the problem is not with the plug or the wire but with the earpiece.
Fixing the Headphones
First of all, when working with any devices or tools that are sharp, heated, electrical, or otherwise potentially injurious, always take all the necessary precautions. If in doubt, seek professional assistance. With that said, here are fixes for the following three types of problems:
- Plug Problems
- Wire Problems
- Earpiece Problems
How to Repair Headphones With a Broken Plug
Tools Required:
- A replacement plug (the same size as the broken one)
- Sharp scissors
- Wire strippers/wire cutters
- A soldering iron
- Sandpaper
Step 1
Using scissors, cut off the old plug, approximately an inch from where the wire meets the plug.
Step 2
Using wire strippers, remove approximately an inch of the rubber covering the inner wires. Inside there will be multiple wires: signal wires (usually one for each ear) and a ground wire or two. The different wires have different colors. The right headphone wire will be red. The left headphone wire will be green or blue. The grounding wire or wires will be bare, therefore copper in color.
Step 3
Using the wire strippers, remove the thin colored coating of each coated wire (about a third of an inch for each wire). You may now see multiple wires of each color. Be sure to twist wires of the same color together. Do this for each color.
Step 4
Using a soldering iron, burn off any enamel caps on the wires. There is no need to do this if the copper ends of the wires are already exposed.
Step 5
Remove the plastic headphone sleeve from the metal base and slide the wires through the sleeve.
Step 6
Using the soldering iron, put a bit of solder on the end of each wire to help them connect easily to the plug.
Step 7
Using the soldering iron, connect the ends of the wires to the pins on the metal headphone plug base. Before doing so, it is advisable to scrape the edges of the pins with sandpaper to help make a solid connection.
Step 8
Reattach the metal plug base to the sleeve by screwing it on tight.
How to Repair Headphones With a Broken Wire
Tools Required
- A marker
- Wire Strippers (or a sharp knife)
- Sharp Scissors
- Shrink Tube
- Soldering iron
- Electrical tape
- Heat gun
Step 1
Locate the exact part of the wire where the break is. Recall how the wire problem was diagnosed by bending the wire and listening? Do that again, but this time focus on the exact segment of the wire being manipulated when the sound crackles. This is the problem spot. Mark that spot with a marker.
Step 2
Using the wire strippers or a knife, cut off the rubber coating protecting the wires at the problem spot. Keep removing the rubber until you have removed enough to expose the break in the wire. There are multiple wires inside: a signal wire (sometimes two) and ground wire.
Step 3
Cut the damaged part of the inner wires off using sharp scissors. Make sure to keep the lengths of the wires even; not doing so can result in further damage to the headphones.
Step 4
Before reattaching the cut wires, slide the shrink tube onto the cable. This will replace the rubber coating that was removed to expose the wires.
Step 5
Reconnect the wires. Be sure to join wires to their same colors. To join two wires, place the two ends together (overlapping) and twist them.
Step 6
Using a soldering iron, solder the spots where the wires were reconnected and let them sit for a while to cool.
Step 7
Be sure to keep the signal wires separate from the ground wire by putting electrical tape around each different wire connection.
Step 8
Use a heat gun to secure the shrink tube to the rest of the headphone cable.
How to Repair Headphones With a Broken Earpiece
Earpiece malfunctions can be tricky to repair, especially if you are working with earbuds. If the problem appears to be internal to the earpiece, the fix is often too complex and tedious to be worth the time and money.
Given that earpieces are complicated, it’s best to check out the manual specific to each brand. The manual may contain additional troubleshooting items and/or repair strategies, specific to your brand and model of earbud headphones.
If there is a crack in the plastic elements of the headphones, there is always the option of using glue to repair the broken plastic segments. Always be careful with strong adhesives, both to protect your skin and to keep the adhesive compound away from any parts of the headphones that may have been damaged by moisture.
If All Else Fails
If, after going through all the steps outlined in this article, you still can’t repair your headphones, at least you know you tried your best, you have just reached the end of the wire. Knowing that can make it a lot easier to justify a new purchase.
New headphones are available at any electronics store, and you can also find anything you’re looking for from Apple to Bose to Sony, to Sennheiser products from Amazon. If you end up considering a new pair, be sure to check out these headphones.
We hope this article has made the task of repairing your pair of headphones a little less daunting. It is always a little scary to begin a task without having a strategy or place to begin. We hope this has provided some direction for you in your headphone repair endeavors. Good luck with your headphone repair mission!