Mixing vocals —it’s just one part of the process, but it can make or break an entire song. Vocal mixing is a skill you have to master if you want to hang with the pros, because badly mixed vocal tracks really stand out, even to a casual listener. But although plenty of people can tell instantly when something vocals sound wrong, a lot fewer people know how to make vocals sound professional.
All this seems intimidating if you’re an absolute beginner. But the thing is, editing vocals really becomes fun with time. Once you get the hang of what you’re doing, your work can make a huge difference to a song. The quality can go from good to amazing, all based on what you can accomplish on your DAW. What you need is a step-by-step guide, so you don’t get lost in the process.
Pro Tip: I use Voxengo Voxformer for every single vocal channel that I’m mixing—from podcasts to R&B and Rap. This plugin includes an
- EQ
- Noise Gate
- De-Esser
- 2-Band Compressor specifically built for vocals
- Saturation
- and more

Step 0: The Importance of Getting a High-Quality Vocal Recording
We’ll call this one “Step Zero.”
It’s sometimes tempting to assume that any problems in the recording booth can be fixed later in editing. It’s true that you can tweak a lot of sounds, edit mistakes, and even mix and match the best pieces of multiple takes, but ultimately, recording vocals is the starting point that dictates everything else. What you’re able to accomplish afterward will really depend on the quality of that original capture.

When you’re in the thick of the mixing process, you’re just working with whatever you’ve been given. If that recording used a second-rate microphone, then you just aren’t going to be able to create something as good as if it had a great capture.
If you produce your own music, I strongly suggest investing in a decent microphone. Maybe you can’t afford to buy top-of-the-line everything you need, and that’s okay—you don’t need to. The important part is that your microphone is halfway decent, your environment is suitable for recording, and you know how to properly use your equipment.
Pro tip: Sometimes, you may be mixing someone else’s vocal performance. Maybe someone sent you a home recording that is less than great, or maybe you weren’t involved in the original recording session at all.
But if you have a say in the recording process, turn the mic volume DOWN! Avoid clipping when recording. This means the sound wave is “cutting off,” leaving no headroom. It creates distortion, and even with the use of special repair tools, can be irreparable.
Clipping:

Not Clipping:

Step 1: Comping and Editing
The first stage in the mixing process is getting rid of the parts you don’t want and keeping the best pieces you have available. Think of it like roasting meat. Before you start cooking a nice pork roast, you first want to trim off any bits you don’t want to eat. Keep what’s useful, and get rid of what isn’t.
In vocal mixing, this stage is called comping and editing. You look at your ingredients (all your vocal takes) and pick the best pieces.
Comping
Comping requires that you listen to multiple takes, find the best parts from each, and stitch them together. This can be a pretty time-consuming process, but it really results in a superior product. Assuming all the takes have a relatively consistent recording quality, you want to focus on highlighting the vocalist’s best work.

Some mixers get down to pulling individual words from different takes, but this isn’t always necessary. How detailed you get is up to you. After comping, you have your “best of” vocal track. Now you want to clean it up.
Editing
Edit out breaths, pops, and clicks that are especially noticeable. Sometimes comping can leave you with a slight click at your edit point. Get around this by adding a crossfade effect for 10 ms (give or take) in either direction.
As for breaths, this is a matter of personal taste. Sometimes, a vocalist’s breath can convey emotion that you want to keep. Sometimes it can just be distracting noise. If you want to get rid of a lot of the breaths, you can investigate breath-removing plugins.
Step 2: Tuning
Occasionally, a vocalist’s work may have a few inconsistencies. Tuning is a process where we can fix a few of them. After pulling the sounds and breaths we don’t want, we need to fix any notes that may not be quite right.

Pitch correction software like Melodyne 4 can help here, although you have quite a few options. Whatever program you use, I recommend using it for fine-tuning rather than just letting it do everything automatically. (While there’s nothing wrong with Autotune, it doesn’t give you as much control.)
There are programs and options that do automatic pitch correction, and this is obviously a much faster option than doing it yourself, but in my opinion, it can easily lead to an over-processed result. In addition, sometimes, you don’t want to fix a “flaw.” You may decide that it sounds more authentic and powerful if you leave it just as the vocalist sang it.
Step 3: Gain Automation and Gain Staging
We’ve gotten our recording in tune and free of any extra noise. Now we want to make sure we’ve got consistent volume. This is done through gain automation and staging.
Gain Automation
Gain and volume are two sides of the same coin. Gain is how strong your incoming signal is, while volume is how loud it sounds. We’ll come back to check on volume again later when we get to the volume automation stage, but we want to take time for gain automation at the beginning. That way, we can be sure we get our volume control without risking vocals that sound overly compressed.
Vocals can have a wide and unpredictable dynamic range. In the analog days, vocalists were encouraged to record loud in order to drown out potential noise, but this doesn’t work so well in the digital age. Now producers usually try to mix compression with fader automation (adjusting volume with the fader).
In my opinion, you get the best results if you adjust the gain manually in your DAW. The “sweet spot” is right at -18dBFS. This doesn’t mean that everything needs to be at that exact point. Try to keep it close; between -12dBFS and -20dBFS for most. If you set this up now, you’ll avoid over-compression.
Staging
Alternatively, you can do what’s called gain staging, which is essentially the same goal but using a plugin to do things automatically. There are some good gain plugins, but I like having a little extra control.
Step 4: Surgical EQ
What Is EQ?
EQ (or equalization) is the process of changing the balance of your frequencies so that everything sounds clear. Without it, one instrument can actually mask another. You start losing the specificity that makes music interesting to listen to. In the case of vocals, you want to make sure that multiple vocalists aren’t losing their individuality. You also want to remove any frequencies that are coming from other sources than the singer, and frequencies that are not essential.

This process can be done before or after compression. If you have time and want to get the best results, you should do it in two stages. Start with Surgical EQ (getting rid of frequencies we don’t want) and then use Tonal EQ to sculpt the tone after compression.
In other words, remove unnecessary frequencies before compression, and add desired frequencies after compression.
How to Do It
You may find that there are some particular bands in the frequency spectrum that got too built up during recording. Maybe it’s because of the preamp. Maybe it’s the singer or the space. By toning these down, you can get yourself in good shape.
When cleaning up problem frequencies in Surgical EQ, you want to remove excessive low-end rumble. This buildup at the lower frequencies often comes from the proximity effect, where a vocalist was very close to the mic.

With a high-pass filter, you can cut this low-end noise out, but don’t overdo it. Only take out pieces below 50Hz if you are able to. When you start subtracting frequencies at 80Hz-100Hz, you risk changing the vocal performance itself.
All this falls into the realm of subtractive EQ. When using additive EQ, you can boost certain frequencies to add character. This will depend on the genre. Typically, boost low if you’re producing hip-hop or high for pop vocals—but again, I recommend doing this after compression.
Step 5: Noise Gating and De-Essing
Next up in the vocal mixing process is noise gating and de-essing. A noise gate is simple—if your recording doesn’t reach a certain volume threshold, the sound is muted completely.
This removes room noise when a vocalist isn’t performing.
A de-esser is a compressor that is specifically targeted to decrease sibilant “S” and “T” sounds. Of course, some preventative steps can be taken in the vocal booth, and it’s a good idea to use a dynamic microphone that softens these noises. But even so, you may still have some rogue sibilance that you need to deal with.

It’s particularly important to tone down sibilant noises. They can really “pop” when they’re played back on a sound system. Fortunately, this usually makes the worst cases easy to identify.
There are plenty of de-esser plugins you can use. In many cases, they will let you listen to the vocal track and narrow the frequency range as you go. Simply work through the song and take note of any harsh sounds where the vocalist hit their “S” or “T” especially hard. Lower the threshold so that they sound more normal.
If you find that the process is taking a long time, it’s a good idea to take a short break and come back with a fresh perspective. If you do too much, you may accidentally make it sound like your vocalist is talking strangely, and that means you’ve gone too far.
Step 6: Multiband Compression
There are a few particular challenges with vocalists that you don’t get so much with instruments. The human voice has an enormous variety of ways to produce sounds, and this can create some challenges in recordings.
Some of these can occur when vocalists shift registers, suddenly produce a sibilant consonant, or belt out a note with a particularly strong force. When this happens in the middle of a recording, it can sound unusually out of place.

Multiband compression targets specific areas where this is a problem. It goes a step further than Surgical EQ, but you might only want to apply it to a few key areas. You might just have one moment where a loud note or a strange tone really leaps out. It would be overkill to mess with the frequencies for an entire take.
You can use a multiband compressor plugin with sidechain to address this. Once you have that set up, simply find the areas where the tone gets a little too sharp. Use your compressor to soften those points. You’re going to do something similar next with de-essing. Multiband and de-essing are often grouped together for that reason.
Step 7: First Compression
After we’ve got the surgical EQ and de-essing out of the way, it’s time to start the process of compression. I like to split this up into stages. We focus on tonal compression first, then do a little tonal EQ. After that, we can do the second half of our compression process. It takes a little extra time to do it this way, but I find it’s the best way to get a really professional-grade sound.
What Is Compression?
Simply put, compression is tightening the distance between the loudest and quietest moments of our audio, shaping the tone, and drawing in the dynamic range so that the output is consistent. The goal here is to make the track easier to listen to, and so the golden rule with compression is that you shouldn’t be able to notice it.
How to Do It
Our objective here is to get the compressor working on the whole song. If I use a peak limiter compressor to apply about 3-5dB of compression, I can address the loudest moments where the vocalist let loose. On average, I’m aiming for more like 2-3dB of gain reduction.
When you apply compression, you’ll find that the attack time will play a big role in the shaping the end product. For instrumentals, a very fast attack can sometimes create a rich-sounding effect. For vocals, it can reduce clarity by chopping the edges of words.
Start the process by using a slow attack time and a fast release time. Then you can adjust each. Slowly increase your attack time, aiming for 5-25ms: but make sure you aren’t squashing the consonants of words.
If you do, dial it back a bit. Next, decrease the release time until you find that each compression translates smoothly to the next. You’ll need to practice this a few times in order to get the hang of it.
Step 8: Tonal EQ
You can also work some magic with tonal EQ. A lot of our Surgical EQ was “subtractive EQ,” where we were cutting out things that didn’t fit. Now we can do a little work on the tone.
What Is Tonal EQ?
Tonal EQ is party “additive,” especially when it comes to boosting the top end. This is one of the best ways to make your vocals sound like they were professionally recorded. Boosting the top end is a “must” for anyone who knows how to make vocals sound professional.
High-end, pricey microphones usually record more of a vocalist’s top end. This is the industry standard, especially when creating a pop track. However, these mics can cost a pretty penny. It’s a good bet you’ll often be mixing vocals that didn’t have access to this equipment. If the recording was done on a more standard mic, you can boost the top end and give your vocals a glossy finish with some tonal EQ.

Slick EQ is an analog modeling EQ plugin, so it’s a great pickup for beginning mixers. Stick with a high shelf instead of a bell curve, and use a 2dB boost above 10kHz. Increase it as you need. Don’t push it past 4dB or 5dB above 10kHz. If it starts to sound grating, ease back.
Step 9: More Compression
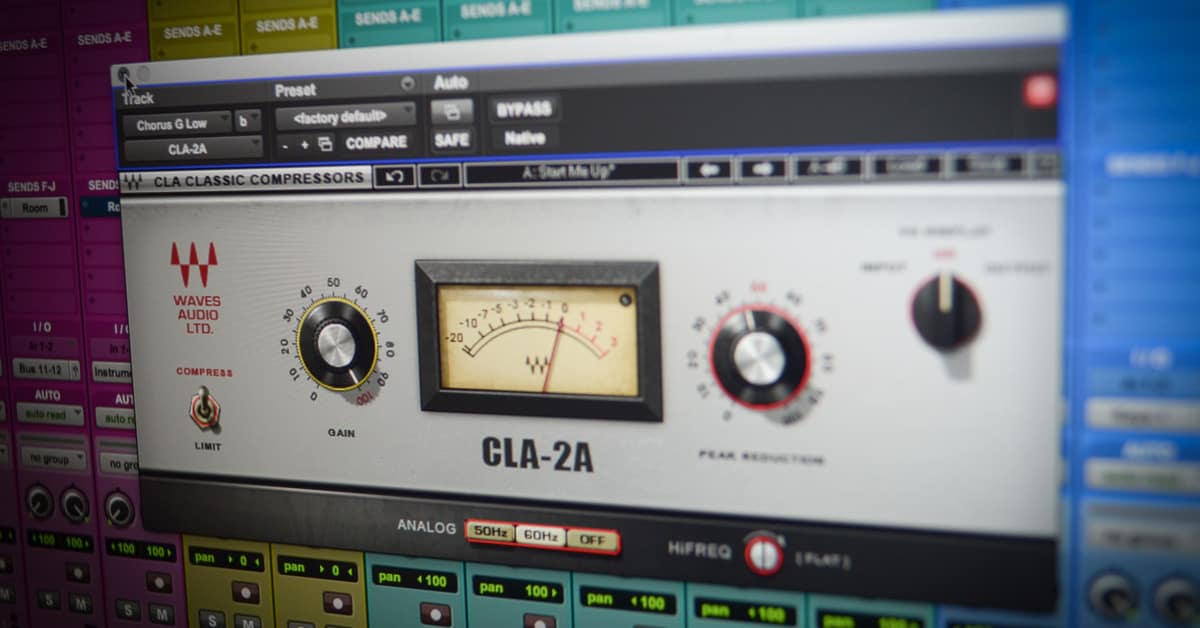
After toning down the peaks in the previous compression stage, you now want to create consistent dynamics. Slow compressors are popular. So is Waves CLA-2A, which is modeled on the classic optical tube compressor.
If you want a more pronounced vocal, you may want to run it through a parallel compression process.
Parallel compression, put simply, is the dry signal mixed with a heavily compressed version of the same signal.

You don’t necessarily need this step, as this is more fine-tuning. How much compression you choose to use will depend partly on your genre. For pop and anything with a very vocals-forward sound, parallel compression will probably be sufficient. For jazz and softer acoustic tracks, you may not need this step at all. Over-compression can add a level of artificiality that may not be right for the genre.
Step 10: Saturation and Distortion
Saturation is used to make a vocal track sound brighter. Again, this is an optional step best used for vocal-forward songs and pop. It can also help make a vocal track distinctive if you know it’s going to be competing with other sounds, such as backup vocals or strong instrumentals.
In the old days of analog, music producers had to fine-tune their saturation. They had a complex process involving the recording tapes and preamps. Now we can just run it through a plugin on the DAW in a fraction of the time. There are tons of plugins available. Softube makes some of my favorite software, and their Saturation Knob is free. Scheps 73’s preamp is also an effective tool—although, I’m a big fan of Ableton’s stock saturation feature.

Distortion often occurs naturally in analog. Although it could be considered an “imperfection,” many listeners love it. It adds richness and complexity to a track. Digital distortion doesn’t always sound as great as analog used to, though. If you use a plugin to add distortion, make sure to start small and work your way up.
Step 11: Limiting
Limiting is the process of cutting down on the really high volume peaks. Essentially, it’s compression with a very fast attack—it does not let the signal go above the desired threshold. This is great for avoiding clipping.
Although we did this early when we were dealing with EQ and Compression, it’s possible that there are still a few that stand out. We might need to tweak a few more high peaks and bring them into the range we want.
At this point, this shouldn’t be too time-consuming because of the work we already did. Basically, we’re just looking for anything that sounds too loud or distracting. Using a limiter, you can bring all of these within range. It’s great to use on your vocal group or vocal buss.
Sometimes, you want to achieve a sudden “punch” of volume, but you don’t want to blow a hole in your speakers in the process. Using fast attack and fast release times can help you punctuate the moments where you want it to seem loud while still keeping the volume normal.
Step 12: Reverb, Delay, and Chorus
Reverb and delay are steps that are often done together, but they aren’t always required.
Reverb
You don’t necessarily want to add too much artificial reverb. The norm today is vocal-forward tracks that sound natural and are clear. However, it may be the case that you need to tone down the reverb a bit if the original recording picked up too much of it.
Maybe you’re going for a particular effect that really accentuates the reverb. That’s just fine. My advice would be to use a lot of it, so it sounds like a conscious choice and not an accident.
Pro tip: Instead of applying your reverb effect directly to the channel and playing with the dry/wet, use a Send instead.
- Create a “Send” or a buss dedicated to reverb
- Add your reverb plugin to the send
- Turn your dry/wet 100% wet
- Send your vocals to the send!
Extra pro tip: Add a compressor to your reverb send, turn on sidechaining, and set the sidechain source as your original signal. This will ensure that your reverb doesn’t overtake your main vocals.

This same trick works with delay!
Delays
You can also create a different sense of space by using delays. You can use a slapback, which changes the timing on the left and right side to create the illusion of space. “Delay throws” can also be used before a vocal silence, maintaining an interesting sound until the next round of vocals.
Chorus
Chorus is another option to add depth to your vocals. It works a bit like a delay with some detuning. If you use a little bit of chorus on your lead vocal, you will get a thicker overall sound. You can use it to flesh out background vocals too, but you only want to use a little bit of this effect (trust me on this).
Step 13: Frequency Slotting / Range Allocation
Range allocation is sometimes also called frequency slotting, which is a little confusing. But they are the same thing. This is a key step for anyone who knows how to make vocals sound professional.
Think of this process as a bit like having a lot of different kinds of food on one plate. If you let all your foods overlap, they’ll lose their distinctive tastes. You want to try to keep them a bit separate so that you can enjoy them the way they were meant to be.
With music, the idea is that you’re giving space to all of your instruments and vocals so that their frequencies don’t overlap and muddy each other’s sounds.
A great way to start is to cut other tracks’ frequencies that are in the same frequencies where you boosted the vocal.
If you boost the vocals at 6kHz, you can cut that frequency out of competing signals. You don’t need to do this for every single instrument and vocal track, because that could take forever. But focus on the areas where you really want clarity.
Step 14: Volume Automation

Volume automation can be used to enhance certain pieces of musical phrases. If a vocalist has sung a phrase at a relatively consistent volume, try using the fader to up the volume just a little bit in a few key places. Your best targets are the beginnings of words and any words or notes that contain an extra amount of emotion.
Step 15: Background Vocals
This is a quick last step. If you have any background vocals, you may want to pan them left and right so that you isolate your lead vocal. By pushing them to the sides, you still get a great sound, but feels like it’s coming from a different place.
And that’s it! You’re done!
How to Make Vocals Sound Professional: Voxengo Voxformer
Now you know how to make vocals sound professional. All the steps outlined above will help you get professional-sounding vocals. It can feel a bit overwhelming, but once you’ve practiced for a while, you’ll come up with your own tricks to get it done just the way you like.
Of course, you need the right tool for the job. Sometimes all of these different available programs and plugins can seem like a lot. So why not make it easy on yourself and look for a VST that can help you minimize the number of programs you have to learn?
When it comes to mixing vocals specifically, I am a huge fan of Voxengo Voxformer. It’s one of the top multi-purpose. VST plugins out there, and it’s fantastic for making your vocals sound amazing. It’s armed with a great multiband compressor and a ton of other features.
The user interface is intuitive and easy to learn, and it includes great presets specifically for vocals—so it’s particularly good for anyone who is just learning the ropes. I highly encourage you to check it out, as it will make the whole process much simpler and give you some professional-grade results.